WATER


(Watch out for Leeks in the boat!)
Building a cedar-strip craft takes focus, ambition, and perseverance.
-
Building watercraft in the summer is ideal, but sometimes winter is the only time life slows down enough for large and involved projects.
-
Strips are typically 3/16 of an inch
-
Steam is a common method used to bend wood, but I am working with thin strips so use a heat gun to manipulate the strips with no down-time for drying.
-
Cedar is rot resistant and is lightweight. Plus it is wrapped in fiberglass and epoxy for strength.
-
By ‘fair surface’ I mean that the strips are on the same level. I rip my strips from long cedar boards with a table saw, then run them through a planer. The planer cleans up any blemishes or saw marks from the table saw. A few extra steps on the front-end of the build saves time and effort during the build - and a heap of sanding too!
-
Building a kayak or paddleboard from scratch is a slow process with a sea kayak taking about 200 hours to complete.
With Paddleboards only the outer surfaces are seen, unlike a kayak, so it is a faster build.

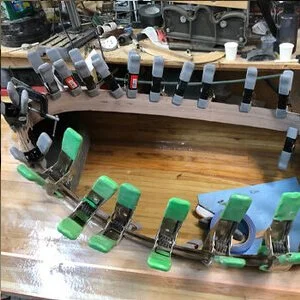
Strongback
-
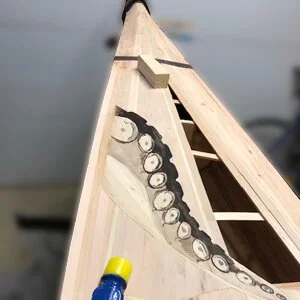
A strongback is a plywood box beam that hold stations (plywood forms) on which the strips will be added.

Aligning stations
-
Placing test strips keeps the stations straight. These strips are removed once the hull is built up with enough permanent strips.

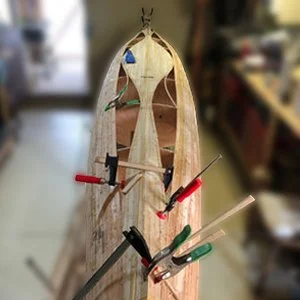
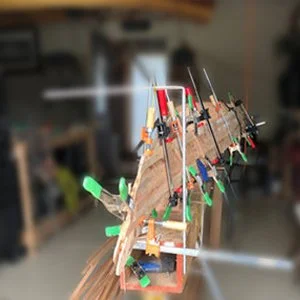
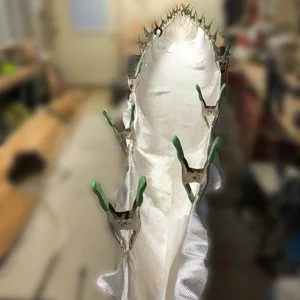
Adding strips
-
Using carpenter’s hot glue to adhere strips to the stations (forms) keeps a clean surface. Stapes are typically used, but leave small holes that I find undesirable. The extra effort using hot glue keeps the deck and hull clean and attractive - seamless!


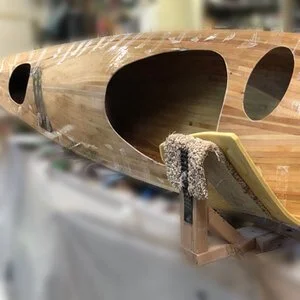
Paddleboard

Pictured is the ‘from-scratch’ 11’8” stand-up paddleboard on launch-day!
It is incredibly stable and quite fast as well. I took liberties with the build and added a dry hatch. The dry hatch reaches from edge to edge and will store bulky items easily!


Playing in the January 2024 lake ice